Monday, June 16, 2014

Supermatic Bobbins


Supermatics have special bobbins. In the pictures you can see three bobbins. The first, on the left, is the bobbin that came with the machine originally. It has holes on both sides and a smooth top. Inside the hole, there is a groove that runs the whole length so that the bobbin can fit on the bobbin winder. Later Supermatics came with a slightly different version of this bobbin, where only one side had holes and the other side was solid. You can see a modern reproduction of this type of bobbin in the middle pictures. I bought these bobbins on ebay from a seller who claims they will fit Supermatics, but that's not entirely true. The groove in these new bobbins is not deep enough, meaning I cannot fit them on the bobbin winder. It's not a big deal, and the bobbins work fine in the machine. On the right is your typical class 15 bobbin. These bobbins are the same size as Elna bobbins, but they do not have the groove running down the inside. They will however, work in Supermatics. The only issue I've noticed is that, rarely, the thread will not pass correctly over the bobbin on a stitch. You can see that the bobbins in the middle and on the left are flat on the top with nothing that could catch the thread that moves over that area when creating a stitch. The class 15 bobbins have a protrusion with a notch in it. Overall, this has not been an issue. If you want to spend less on bobbins (you can buy 12 class 15s at Walmart for very little, wherease the 'real' bobbins cost about double), you can definitely get by with class 15s in a Supermatic. Given the open design of the Supermatic's bobbin area, without a bobbin case even, I have a suspicion that even class 66 bobbins would work as well. Unfortunately, I don't have any class 66s around to try. If anyone has any experience with this, please let me know!

Tuesday, June 10, 2014

Supermatic Pics

So I finally got around to taking some pictures of my Supermatic. First, some details. Supermatics are stamped on the bottom with the date that they were manufactured, so no need to look up serial numbers to determine production date! I at first couldn't find any stamp on my machine, but then I had it standing on its head on the floor (trying to get some screws on the bottom loose) and I happened to catch the bottom of the machine from a certain angle; I could see a date! Very faint, but still there: "3 Juin 1954" (the names of the months were stamped in French. 'Juin' is of course 'June'). I had already known that my machine is one of the earlier Supermatics. There are a few things that you can see right away that tell you from what era your Supermatic comes. First, and most visible, is the color. Later Supermatics were grey and white or brown and white. Earlier than that were two-tone green models with most of the machine in light green with a dark green flywheel and machine head. But the very earliest machines were entirely green, like my machine. On this model, the "ELNA" decal is white. A Supermatic that's solid green means that it was manufactured prior to 1956.
To narrow down a machine without a visible manufacture date even more, open up the little door on top of the machine. This reveals the "Elnagraph Regulating Device" or simply "Elnagraph". My Elngraph is shown in the picture below:

You can see that the cam (or "Elna disc") is the black ring in the middle. On top of that cam is a black, plastic nut. This was the first form of the Elnagraph to hit the market. To remove and change cams, one had to first unscrew the plastic nut and then use the metal fork that came with the machine to lift out the cam. Later Elnagraphs simplified this process. They can be identified by a lack of a black plastic nut. In its place is a silver metal cylinder which was depressed to make the disk pop up: no nut or fork needed. This new Elnagraph made changing cams much simpler than in my machine. It appears that the latest models of the solid green Supermatics had this newer Elnagraph. If your Supermatic is solid green with a newer Elnagraph, it was produced in the mid- to late-1950s.
Two other differences I have noticed are to be found in the black plastic electrical box underneath the flywheel (see photo below). The earlier machines have a cord that is not removable from the machine; later machines had cords that plugged into the machine and could be removed for storage. The other difference is the kind of light switch. My older machine has a horizontal switch; newer models had a vertical switch.

Style & Design

Something that no one really seems to mention about the Supermatics, but I think that most people recognize, is the beautiful design of the machine. It stands out among the black and gold Singers of the time and even the flashy machines of the late 50s and later. It is not only different because of its color, but its design shows thoughtfulness both inside and out.

The first thing I noticed with the Supermatic is the view of the flywheel. As you can see in my photo, the flywheel and the right side of the machine form a column. The base includes the Elna logo, information about the model, the light switch to the left, and the power cord protruding to the right. The base is flared from the main column, which itself leads to the flywheel. The flywheel is balanced in the center of this column. This is attention to detail that you rarely if ever seen in sewing machines.

the column-like view of the flywheel
the model plate with light switch and power cord

If we look at the machine head, we also see this attention to detail and balance. The head tapers evenly from the top to the bottom, culminating in a centered black disc. This is the upper-thread tension regulator. Unlike many other sewing machines with the tension regulator protruding from the front of the machine, the Supermatic's regulator is on the left and part of the balanced machine head. The whole head is on a hinge and opens much as on other sewing machines.


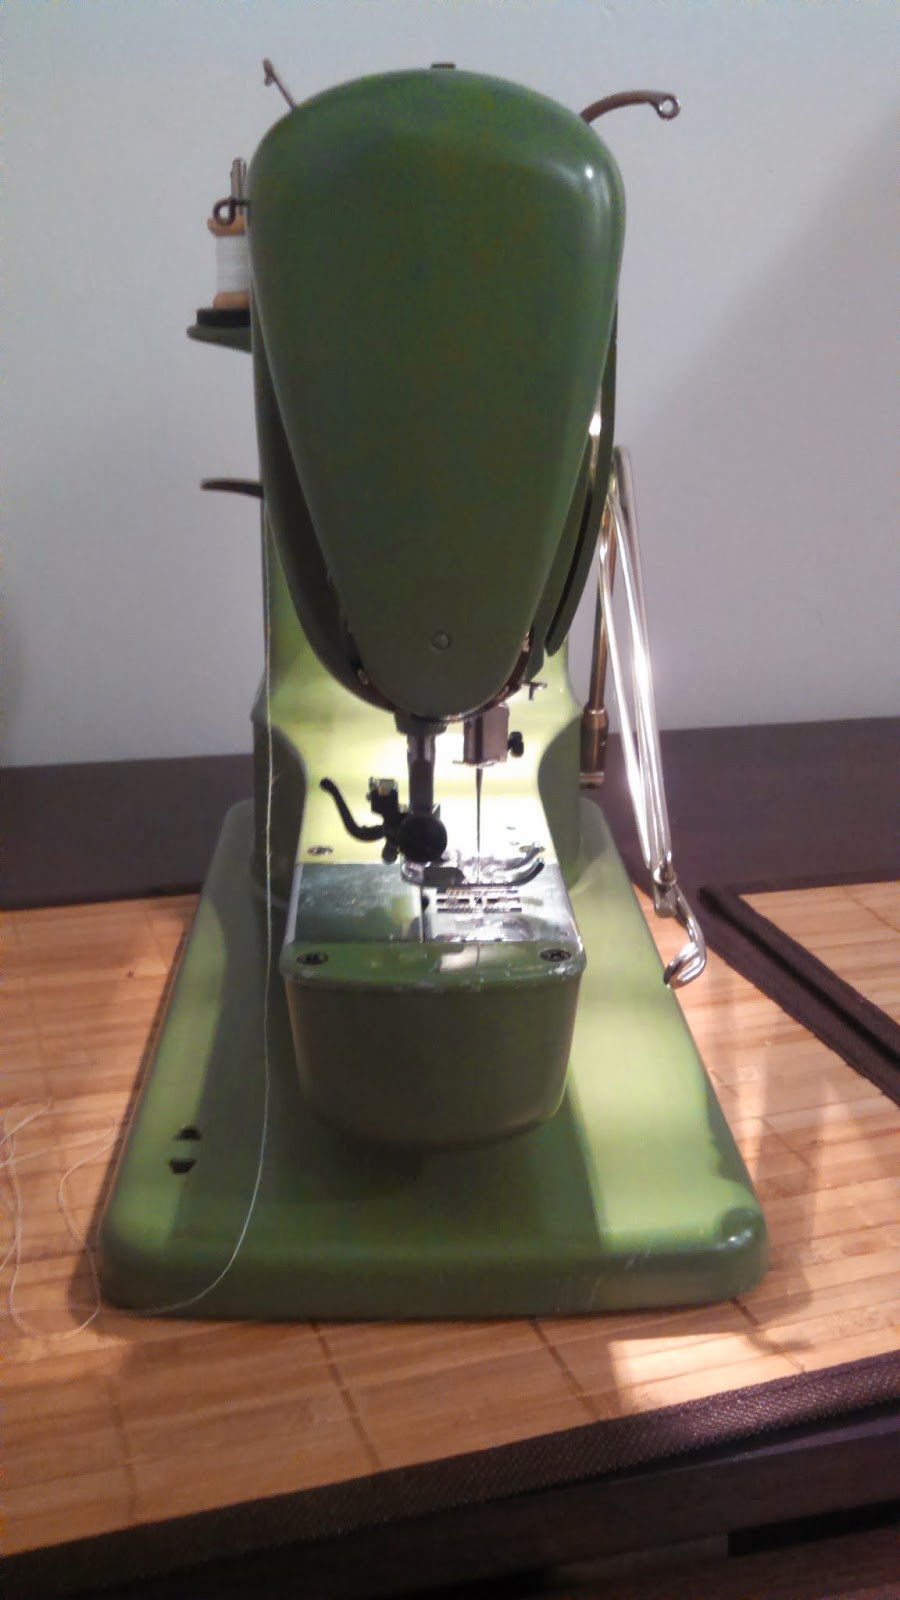
view from the left showing tension regulator

inside head
The oldest Supermatics also included two holes in the metal base, behind the needle bar at the back of the machine. These two holes are for the electrical plug; the plug could be inserted here when transporting the machine. The slats are to fit American plugs and the circles are for the European Schuko plugs. It appears that one base was manufactured for both markets.

holes for electrical plug storage (only on earliest Supermatics)
 I will post some information about the bobbins this Supermatic uses, as well as show you some stitching videos. Til then!

Busy busy busy!

Hello all,

I've been busier with work than I anticipated, but I've also been able to get some practical experience with my Supermatic and have finished some dresses with it. I hope to post some pics later. For now, I thought I would link to some helpful videos on Youtube for those who are interested in early Supermatics.

Replacing the Pulley


This first video is probably the first step you'll take if you've recently purchased a Supermatic. The main design flaw (and, yes, it's really a flaw) is that the Supermatic is neither belt-driven (like a lot of older sewing machines) nor gear-driven (like the Singer 401a, for example). The flywheel is turned by a rubber pulley on the motor drive-shaft that presses against it. In order to avoid slippage, the tension has to be sufficiently high between this pulley and the flywheel. But what happens to old rubber, or even new rubber for that matter, that's sitting, pressed up against metal? That's right, it gets flat, or develops a 'flat', as they say. After a while, or even years, of this situation, the pulley will be irreparably damaged. There is no other repair option other than replacing it. A replacement pulley will run you around $25, but beware, they aren't always of the best quality. My first replacement broke within a few days of use. There is however a large community devoted to all kinds of Elna sewing machines, and one enterprising person has designed an aluminum pulley with easily-replaceable rubber rings. It is this pulley which I finally installed on my own machine and I couldn't be more pleased.

Oiling your machine!

The second video is about how to properly oil an older Supermatic. If you weren't lucky enough to get a manual with your purchase, you will definitely want to watch this video! Vintage sewing machines need to be oiled frequently: at least once after every project. If your machine was sitting for a long time in disuse, you may even want to oil it more often than that for a while before the machine is no longer 'dry'. Sewing machine oil is special: it is supposed to dry away after a while and not gunk up like other kinds of oils. You can buy Singer sewing machine oil in a applicator container for relatively little at Walmart. Try to stay away from anything else, even 3-2-1 oil is not recommended. Also, if your machine came with an oil can, empty the old oil and refill the can. Old oil can be detected by its color; if its slightly yellowed and not clear, throw it away.

This last video is not of a Supermatic, but of the model known as "Transforma". Unlike the Supermatic, the Transforma was a straight-stitch-only machine. It could be upgraded, however, to a Supermatic if you wanted to. So, if you couldn't afford a new Supermatic in the 1950's (which ran around $250, the equivalent of just under $2,500 in today's money), you could purchase the less expensive Transforma and save up to upgrade it later. As you can see in this video, this Transforma sews beautifully, both backwards and forwards, and doesn't even vibrate enough to knock over a pencil balanced on its arm. Very impressive!


Friday, March 28, 2014

Elna coming tomorrow!

I just heard back from the repair man: I'll be able to pick up my Elna tomorrow! I'm very excited to see it again. He said it was very stuck, but it should be working well now. I'm also waiting on some more cams that I ordered. I will have a post soon about my current Elna disc collection.

Monday, March 24, 2014

Elna in the shop!

Since my Supermatic had been sitting for a while before I bought it, I had to send it to the shop to get the mechanism unstuck and the motor pulley replaced. I'm still waiting on it to be returned, and I hope to start a project soon!

Thursday, March 6, 2014

Welcome!

This blog is devoted to my experiences learning to sew with a vintage Elna Supermatic sewing machine. I wanted to document my whole experience with this machine, which I have just recently purchased, and so I've set up this blog for all those out there who are fans of Elna. Hopefully, some people will find my posts not just amusing but also informative. I'm very excited to see what I can learn with this machine!